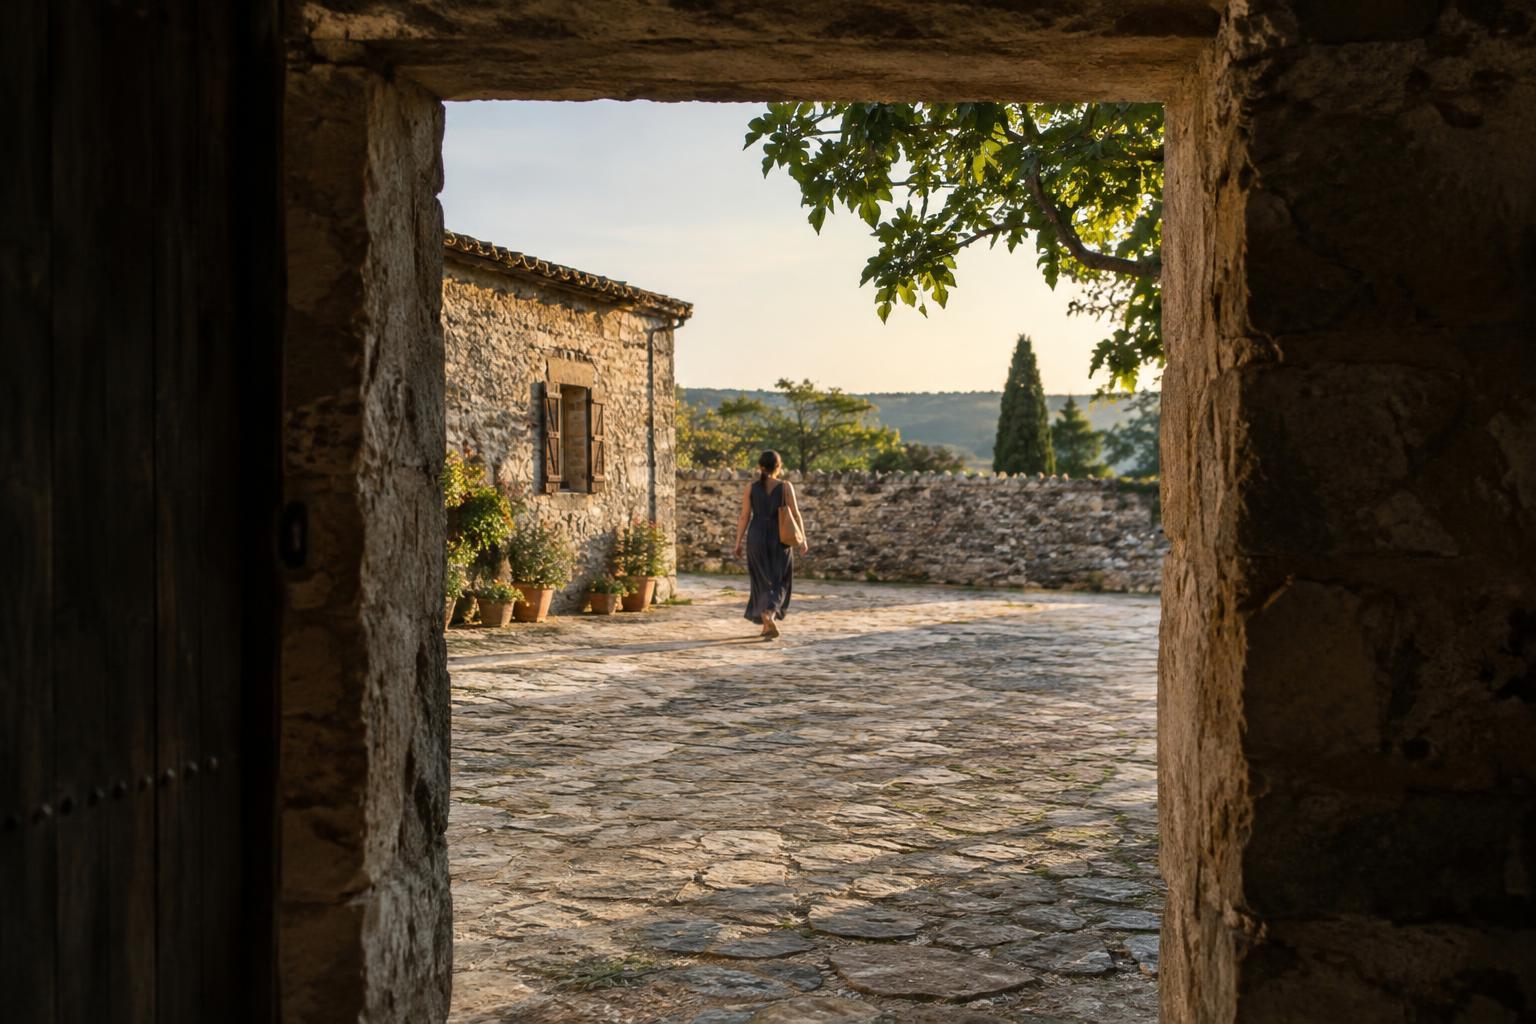
What an internal frame can do
A frame within the frame is an element in the scene that surrounds or borders the subject. A doorway around a person, a window around a street view, or branches along the top of a landscape can all serve this purpose. Unlike the outer edges of a photograph, these elements belong to the scene itself. They can guide the viewer’s eye inward while also showing something about where the picture was made.
An internal frame can create depth when it sits closer to the camera than the main subject. It can also make a busy scene easier to read by narrowing the area of attention. But it is not automatically an improvement. If the border is brighter, sharper or more visually complex than the subject, viewers may spend more time looking at the frame than looking through it. Start by identifying what the photograph is about; then decide whether the surrounding element helps communicate that idea.
Choose edges that have a purpose
Doorways offer strong lines and a clear sense of transition between spaces. Photographing from one room into another can show a subject in relation to their surroundings. Step sideways and notice how the opening changes: one position may separate the subject cleanly from the doorjamb, while another makes the jamb appear to grow out of their head or shoulder. You do not need a perfectly symmetrical doorway. An off-center opening can leave useful space in the direction a person is looking or moving.
Windows bring their own choices. A dark interior around a bright outdoor view may form a simple border, but windowpanes, reflections and objects on the sill can compete with the subject. Decide whether those details add meaning before including them. Natural edges are usually less regular: branches, rock formations, tall grasses or the shadow beneath an overhang can partly enclose a scene. They often work best when their shapes lead toward the subject rather than covering it. An incomplete frame can be enough; a visible edge along one side and the top may give the eye all the guidance it needs.
Control placement, depth and light
Before taking the picture, check the space between the subject and the inner edge of the frame. A narrow gap can look accidental, while a slight overlap may hide a recognizable detail. Move your feet, change camera height or wait for the subject to move. Look at all four corners as well as the center. The strongest internal frame is not necessarily the largest one; leave enough of the main scene visible for the viewer to understand it.
Focus and exposure can reinforce the relationship between foreground and subject. If the doorway or branches are close to the camera, focusing on a more distant subject may soften those foreground edges, making them less demanding. A smaller aperture may bring more of both into focus when their details matter, though available light and subject movement may limit that choice. Bright windows can also produce a large difference between interior and exterior light. Decide which area needs detail, expose with that priority in mind, and review the image for lost information that matters to the story. A silhouette can be effective when the subject’s outline is enough; it is less useful when a facial expression or action is essential.
Use the frame to add context, not just decoration
An internal frame can describe a relationship: a person seen through a workshop entrance, for example, may appear connected to the activity inside. A person seen through a distant window may feel separate from the photographer. Neither effect is universal; surrounding details and the viewer’s interpretation also matter. Ask what the frame suggests about distance, access or place, and whether that suggestion fits what you intend to show.
This matters especially in documentary work. Shooting from behind a doorway may imply observation from outside a space, while a tightly framed window view may omit activity just beyond its edges. Every photograph excludes something, but a striking composition should not make important context disappear by accident. If the image is meant to inform as well as engage, consider making a second, wider photograph that shows where the framed view sits within the larger scene.
Practice by comparing versions
Choose one subject and make several photographs without changing the subject itself. First, shoot a clear version with no internal frame. Then try a doorway, window or natural edge from different positions. Make one version with a prominent, sharp border and another with a quieter or softer one. Compare where your eye goes first in each image, whether the subject remains easy to identify, and what each version reveals about the setting.
When editing, resist cropping simply to make the opening look perfectly even. A little irregularity may preserve useful context or give the picture a more natural rhythm. Keep the version in which the frame supports the subject and the intended meaning. If the simplest, unframed photograph does that better, use it. Framing within the frame is a choice for directing attention, not a rule every scene must follow.


