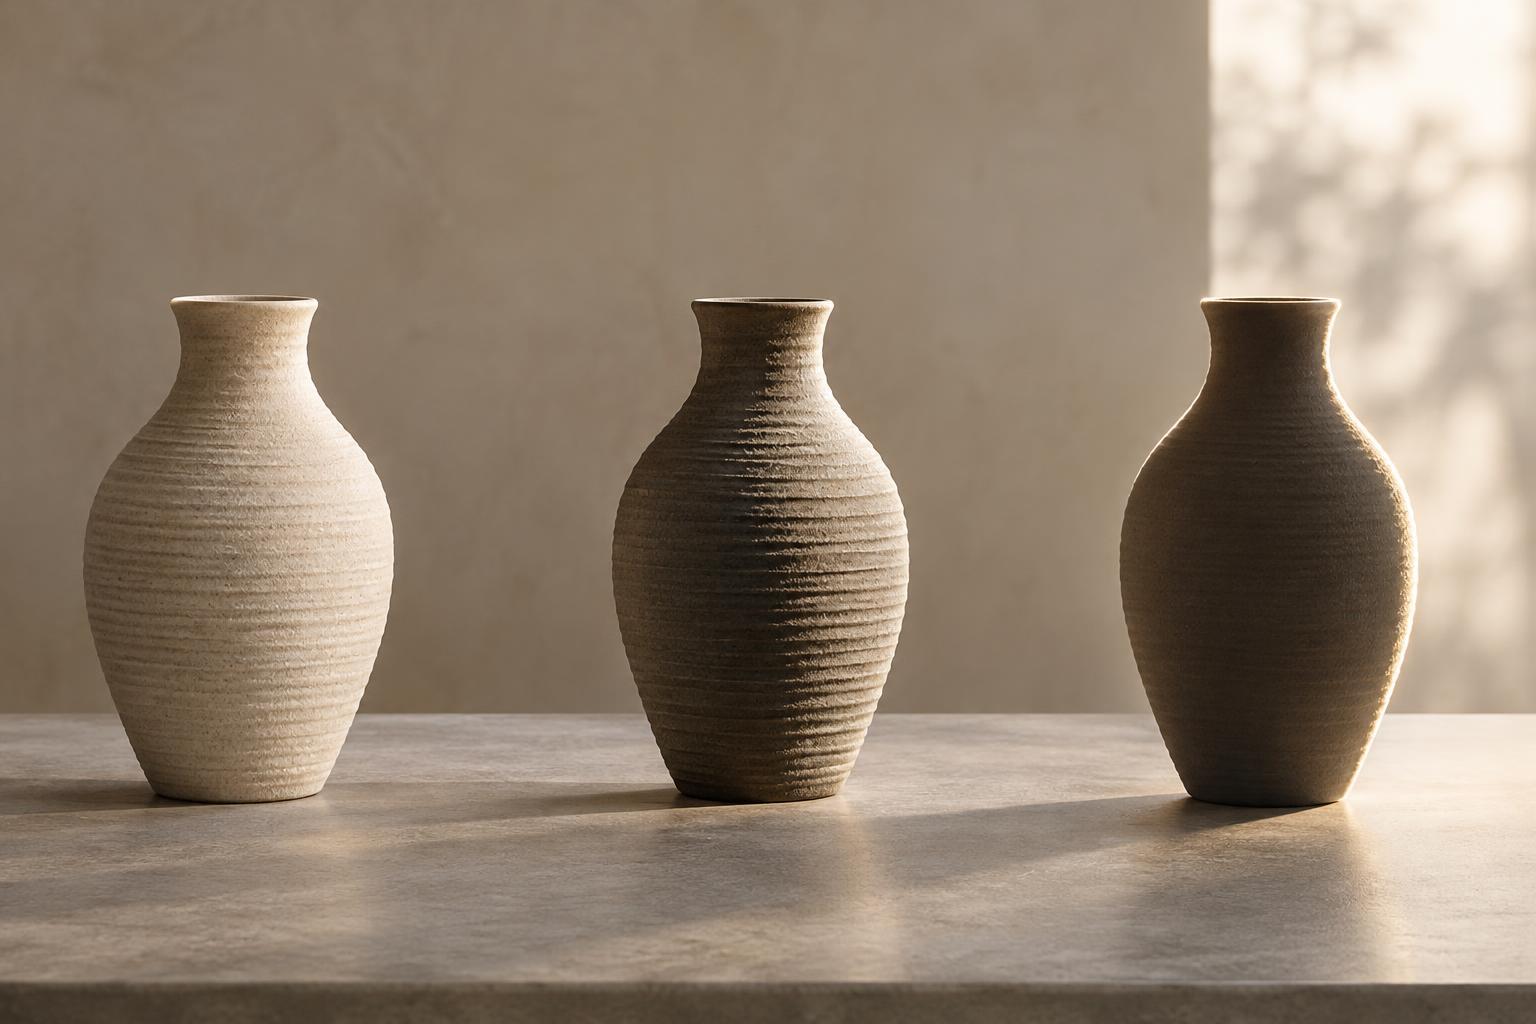
Start with the direction of the light
Light direction describes where a light source sits in relation to the subject and camera. In front lighting, the source is broadly on the camera’s side of the subject. In side lighting, it reaches the subject from the left or right. In back lighting, the source is behind the subject, facing toward the camera. These are useful categories, not fixed positions: moving a lamp a little at a time produces a gradual change between them.
Direction helps determine which surfaces appear bright, where shadows fall and how clearly edges stand out. It works alongside other choices. A large nearby window usually produces softer shadow edges than a small bare lamp, while a pale wall may bounce light into areas that would otherwise look dark. To study direction, first keep the subject, camera position and light source as consistent as you can. Then change only their positions relative to one another.
Front lighting makes detail easy to see
With the light close to the camera’s direction, surfaces facing the lens receive fairly even illumination. Shadows tend to fall behind the subject or into places the camera cannot see. This can make facial features, clothing or the information on an object easy to read. It is useful when clarity matters more than dramatic modeling, such as when photographing a labeled object or making a straightforward portrait.
The trade-off is that shallow ridges and surface texture may appear less pronounced. Without visible shadows beside those features, a rounded form can look flatter. Front lighting can also produce distracting reflections on glass, glossy packaging or skin, especially when the source is small and direct. If an image looks too flat, move the light slightly off-axis rather than immediately increasing its brightness. Even a modest shift can add a shadow that helps describe the form.
Side lighting reveals shape and texture
Side lighting illuminates one part of a subject while allowing another to fall into shadow. Those changes in tone help describe curves, corners and depth. Light skimming across a rough wall, for example, casts small shadows beside raised areas; the same wall may look smoother when lit from the camera’s direction. Side light can be useful for portraits, still life and architectural details when shape is central to the picture.
Not all side lighting looks severe. A broad window or a diffuser can keep the transition from light to dark gentle. A smaller source often creates more defined shadow edges. You can also place a white card on the shadow side to return some light to the subject, or remove that card when you want stronger contrast. Watch the background as well as the subject: a side light may cast a visible shadow that either clarifies the scene or competes with its main point.
Before settling on a position, look at what the shadow hides. Contrast can direct attention, but important information may disappear into a dark area. A slight turn of the subject or a small change in camera angle may preserve the sense of depth while keeping that information visible.
Back lighting emphasizes outlines and separation
When the source is behind the subject, its camera-facing surfaces receive less direct light. A bright edge may appear around hair, leaves or another irregular outline, helping the subject stand apart from the background. Thin or translucent materials can glow as light passes through them. Back lighting can therefore draw attention to an outline or material rather than to the details on the front of an object.
Exposure becomes an important choice here. If you expose for the bright background, the subject may become a silhouette. If you expose for the subject, the background may lose detail in bright areas. Neither result is automatically wrong; choose according to what viewers need to see. A reflector or another gentle source on the camera side can reveal front detail while retaining a bright edge. If stray light enters the lens and reduces contrast, try shading the lens without blocking the subject.
Choose a direction for the information the image needs to carry
Try a controlled comparison with a textured object such as a folded cloth or carved piece of wood. Put it near a window or a movable lamp, and photograph it from the same camera position with the light in front, to one side and behind. Keep the framing similar, and adjust exposure when needed rather than expecting every frame to have the same brightness. Compare the images for visible texture, shadow placement, background separation and lost detail.
Use those observations to guide the next picture. Front light may serve a clear description; side light may explain a surface or three-dimensional form; back light may make an outline the strongest feature. In documentary or explanatory work, consider whether a striking shadow conceals something the viewer needs to understand. The most useful light direction is not necessarily the most dramatic one. It is the one that helps the photograph show its subject accurately and with purpose.


