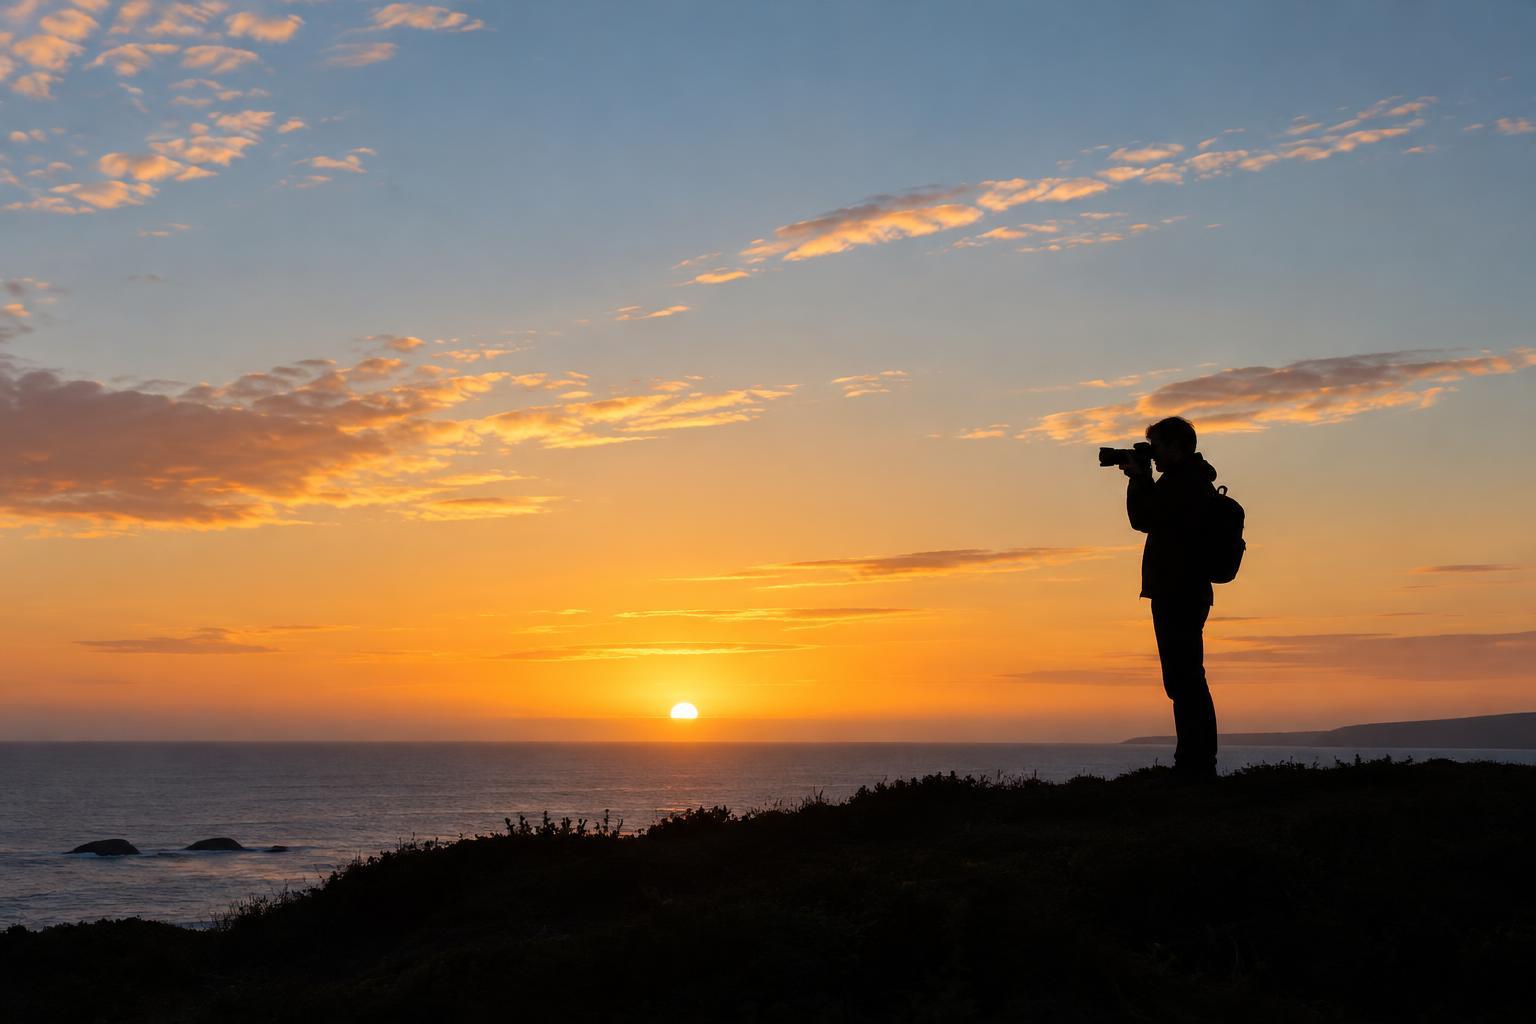
What makes a silhouette work
A silhouette appears when a subject is much darker than its background. Instead of showing texture, facial features, or color within the subject, the photograph communicates through outline, posture, and the space around the shape. This makes silhouettes useful when a gesture tells the story more clearly than surface detail would.
Start with a scene that has a bright, fairly uncluttered background: open sky, a sunlit doorway, a bright window, or a reflective patch of water. Put the subject between your camera and that light. You do not need the sun itself in the frame. In fact, a broad area of brightness often makes it easier to see the subject’s edges and avoid distracting glare.
Before adjusting camera settings, ask what a viewer should recognize. A person walking, a bicycle, or a tree may read immediately from its outline. A pile of overlapping objects may not. If the shape is hard to understand at a glance, changing your position will often help more than changing your exposure.
Place the subject for a readable outline
Look around the edges of the subject, not just at its center. If a person’s arms rest against their torso, the arms may disappear into one dark mass. A slight turn, a step, or a pause between movements can separate them. For a portrait, a side view may define the nose and chin more clearly than a face pointed toward the camera.
Keep important outlines against the bright part of the scene. A person standing in front of a dark building might have a clear head against the sky but lose their legs against the wall. Lowering your camera, moving sideways, or waiting for the person to reach a gap can create separation. When photographing more than one subject, leave enough space between them that their shapes do not merge accidentally.
Pay attention to the space around the silhouette as well. A horizon that cuts through someone’s neck, or a branch that appears to grow from their head, can weaken an otherwise strong frame. Leave room in the direction a moving subject faces if that space helps convey motion. These are choices rather than rigid rules: an overlap can be effective when it creates a deliberate, understandable shape.
Expose for the background
A camera’s automatic exposure may try to brighten a dark subject, turning a crisp silhouette into a muddy figure and washing out the sky. To keep the background bright but detailed, base your exposure on the bright area behind the subject rather than on the subject itself. Avoid measuring directly from an unusually brilliant spot if you want the rest of the background to retain some brightness.
On a phone, tap a bright area of the background, then use the exposure adjustment to darken the image until the subject reads as a strong shape. On a camera with exposure compensation, try a negative adjustment and review the result. In manual mode, choose an aperture and shutter speed suited to your subject, then adjust exposure while watching the background and the silhouette. A moving person may need a faster shutter speed than a stationary tree.
Check the photograph rather than relying only on how it looked to your eyes. If the background is featureless white when you wanted visible clouds or color, reduce exposure. If the outline disappears into a background that is too dark, increase exposure or choose a brighter backdrop. A little detail inside the subject is not a failure; decide whether it supports the image or competes with its shape.
Choose light and timing to suit the story
Low-angle light can make it convenient to place a subject against a bright sky, but silhouettes are not limited to any particular time of day. A doorway can frame someone indoors, while a window can provide a clean background for a small object. The useful condition is a clear difference in brightness between subject and background.
If the light is changing or the subject is moving, make several frames and vary one thing at a time. Try a wider view that shows the setting, then a closer view that emphasizes gesture. Wait for a foot to lift, a hand to separate from the body, or a profile to become distinct. Review the edges at full size when possible: a thumbnail can hide small overlaps that make a pose confusing.
Edit with the image’s meaning in mind
Editing can refine a silhouette, but it works best when the outline and background were clear in the original frame. Adjust brightness and contrast to guide attention, and consider whether a crop removes distracting edges without taking away context. Avoid darkening so aggressively that objects essential to understanding the scene vanish.
In documentary work, a silhouette can protect some visual details while still communicating a person’s presence. It does not necessarily conceal identity: clothing, location, companions, or a distinctive posture may remain recognizable. Consider what the photograph implies and what information the viewer needs. The strongest silhouette is not simply the darkest one; it is the one whose shape, setting, and exposure work together to tell a clear and responsible visual story.


