Start by looking at the light
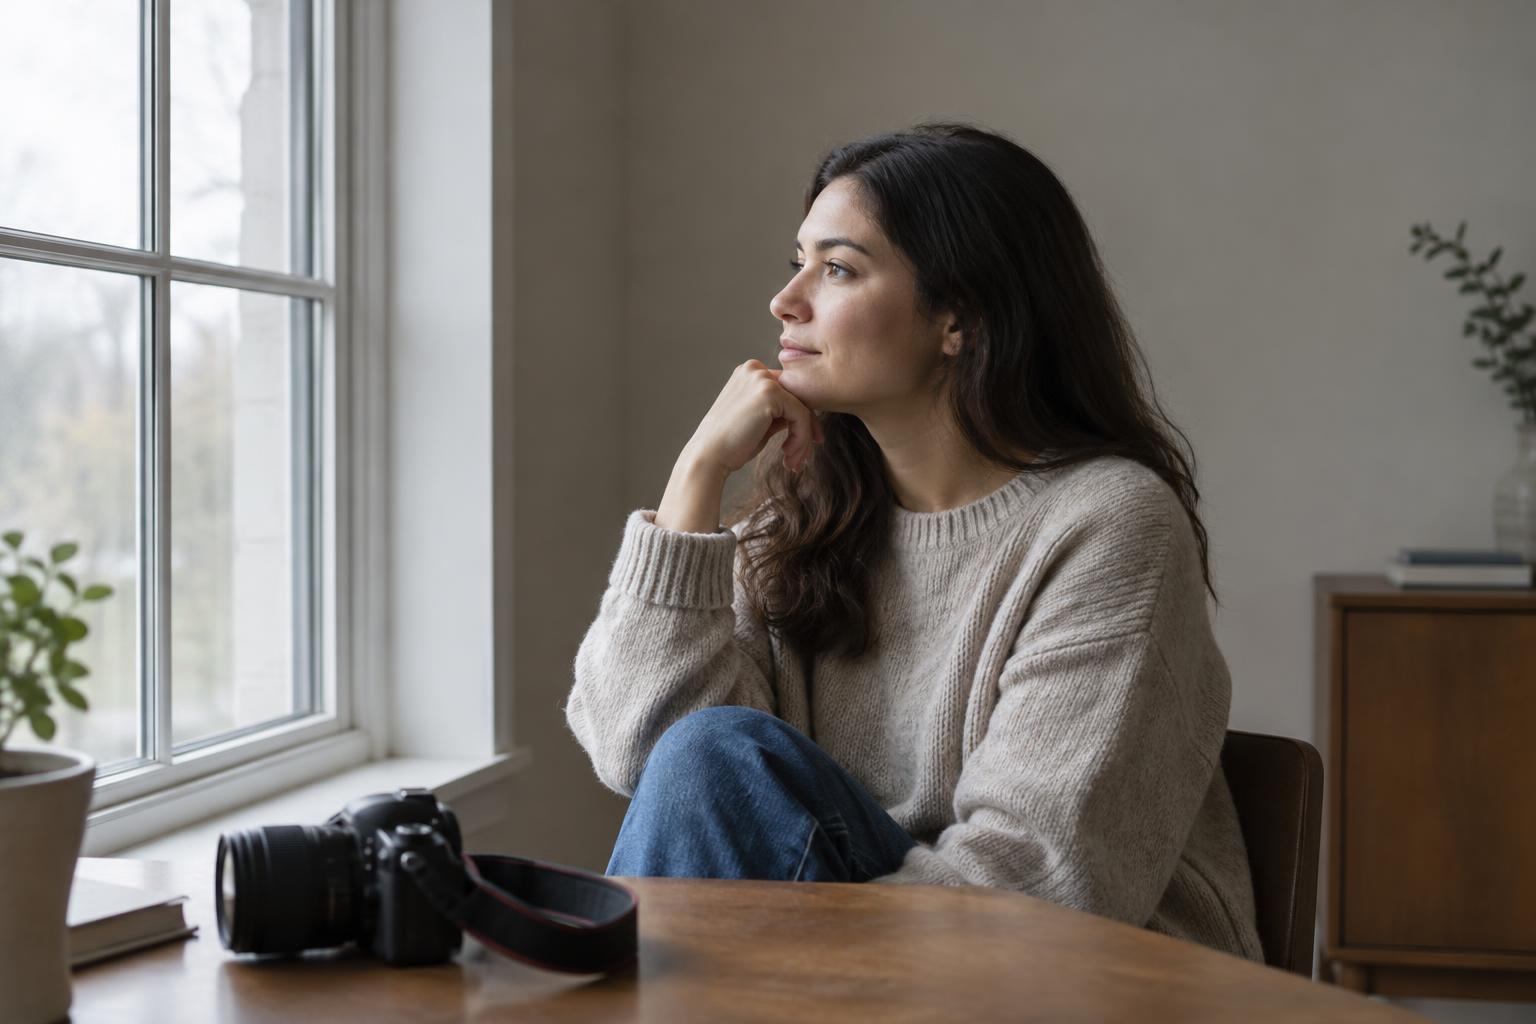
A window is a useful indoor light source because you can change the look of a photograph simply by moving your subject. Before placing anyone, turn off nearby lamps for a moment and look at the room. Notice which surfaces receive daylight, where shadows fall, and whether sunlight strikes the subject directly. The window’s size, the weather and the time of day can all change what you see, so treat your first setup as a starting point rather than a fixed recipe.
Soft light tends to make shadow transitions gradual. A large window, cloudy sky or thin curtain may give you that look, while direct sun through a window often produces sharper shadows and brighter patches. Neither is automatically better. If direct sun creates distracting stripes across a face, move the subject out of the sunbeam or use a sheer curtain to diffuse it. If you want those stripes as part of the composition, check that they fall where you intend.
Choose an angle for the face or object
Begin with your subject beside the window and turn them slightly toward it. Light coming from the side can reveal shape and texture while leaving a shadow on the far side. Rotate the subject a little at a time and watch how the highlight and shadow change. For a portrait, small turns of the head can make more difference than moving the camera. For an object, rotate either the object or the surface it rests on until its important details are clear.
For a more evenly lit result, position the subject facing the window and photograph from near the window’s direction. To emphasize an outline instead, put the window behind the subject and photograph toward it. Backlighting can create a silhouette or a bright edge, but the camera may expose for the bright window and leave the subject dark. Decide whether that darkness serves the image before adjusting the exposure. These positions are options, not rules: the useful question is what the light helps your viewer notice.
Adjust distance, shadows and background
Move the subject closer to the window when the room feels dim or you want the daylight to have a stronger effect. Move them farther away when the bright side of the subject is too prominent or when you need more space in the frame. Distance can also change how quickly the light falls across the subject and surrounding room. Make one move at a time so you can tell what improved the image.
Look beyond the subject as carefully as you look at the light. A bright patch on the wall, a cluttered shelf or a window frame crossing behind a head may pull attention away from the story. You may be able to solve the problem by shifting your camera a step sideways rather than rearranging the room. If the shadow side is darker than you want, place a white wall, sheet of paper or other light-colored surface opposite the window to reflect some light back. Remove it if the added brightness flattens the shape you liked.
Set exposure for what matters
Indoor window scenes often contain a wide range of brightness. A camera that makes the room look bright may render the window as featureless white; one that preserves detail outside may make a face too dark. Check the image after a test shot, paying attention to the subject rather than relying only on the camera’s overall brightness. If your camera allows it, adjust exposure compensation or manual settings until the important details are visible. You may not be able to keep detail everywhere in a single frame, and that is often an acceptable choice.
Also watch for mixed color. Daylight from a window and warm indoor bulbs can give different parts of a scene different color casts. Turning off some room lights may create a more consistent look. If you need them on, check skin tones or neutral surfaces in your preview and adjust white balance as needed. A slower shutter speed can make handheld images blurry in a dim room, so steady the camera or increase the available light before asking the subject to hold an uncomfortable pose.
Make a small, repeatable study
To learn what a particular window does, make a short series with the same subject: facing the window, turned sideways and positioned with the window behind them. Then try moving closer and farther away. Keep your framing similar where possible, and compare the direction of shadows, the brightness of the background and the visibility of details. This exercise is more informative than searching for a single universally correct position.
When photographing a person, explain what you are testing and give them room to move comfortably. Review the photographs together if appropriate, especially when shadow or backlight changes how clearly they appear. Good window-light composition is not just a technical achievement. It is a deliberate choice about what the image reveals, what it leaves in shadow and whether that choice suits the subject.


